Organizing Client Projects

When I start a new project there are a few things that I do to organize that new project, this is one of the systems I have created to make my business more efficient. In this post, I've attempted to describe my system for you. It feels a lot more complicated to explain the system in words than it is in actual execution.
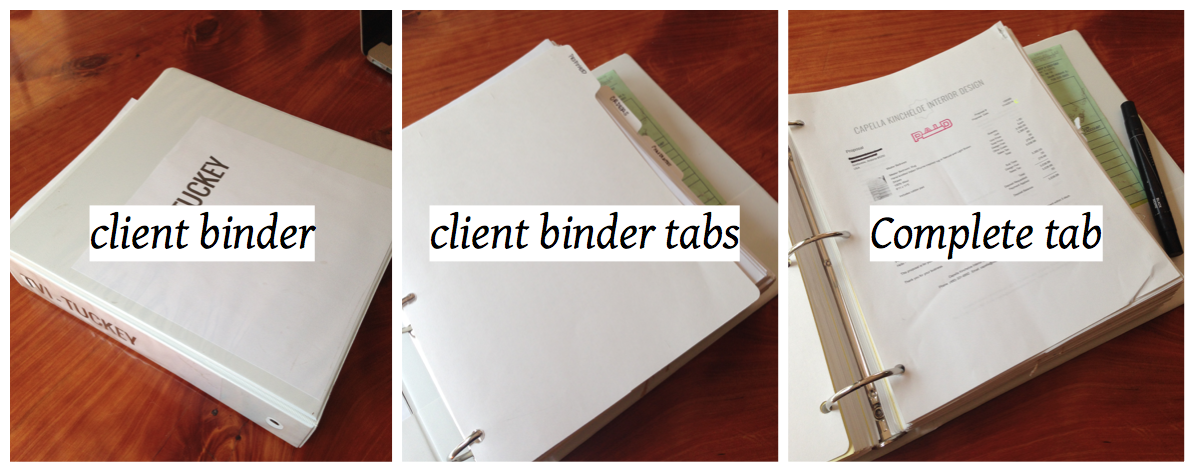
Client Binder
I start with a 3" white 3-ring binder and a stack of binder tabs. Much of my organization is based on using Studio Designer, but if you don't use Studio Designer or a project management software you can still organize your projects this way.
I label the binder tabs and section the 3-ring binder:
- Proposed - These are the Proposals to the client.
- Orders - These are the items that have been Ordered.
- Complete - When an item has been delivered to the project. Complete and Done.
- Client Documents - Client Questionnaire, Onboarding Worksheet, Contract (these are all included in The Golden Blueprint).
- Project Documents - Measurements, plans, elevations, notes, HOA covenants, etc.
Organizing my client binders this way allows me to quickly see the status of each item - whether it still needs to be paid for and I haven't received payment from the client yet (Proposed), or if it is on order (Orders), or if it has been delivered to the client (Complete).
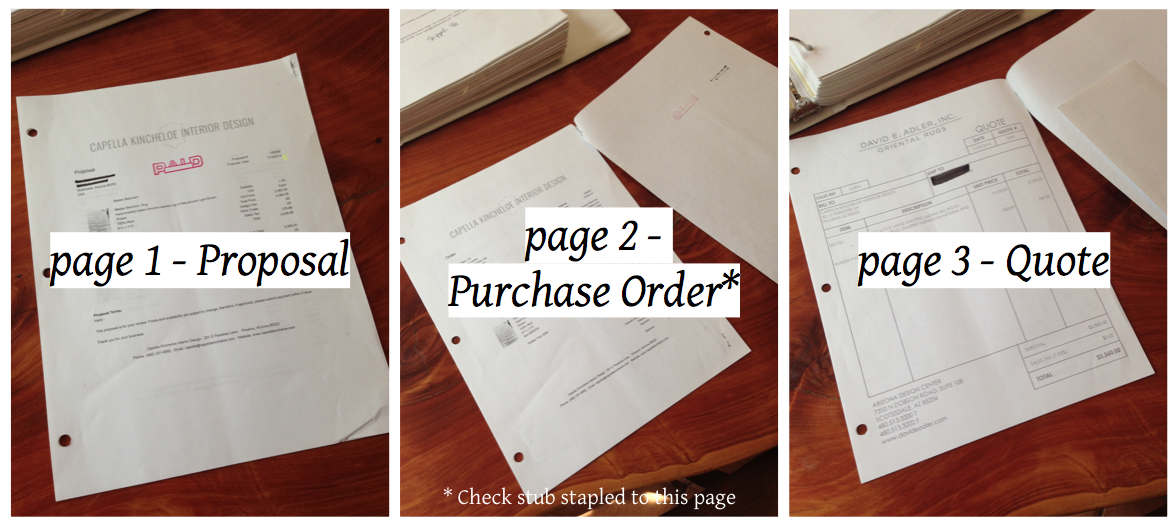
Generally, I only propose one item on a proposal. That item's paperwork is always together in a single bundle and added to as the project requires. For example, the sofa for the living room is on one proposal. The chair is on another proposal. Then stapled behind each item proposal may be the furniture sketch, the fabric cutting, the quote from the manufacturer, the measurements from the stairwell ensuring that it'll fit, etc. You want all the info for that item to be stapled to the item proposal. This paperwork bundle is then moved through the following tabs.
Proposed
The proposed section are proposals that I have sent to the client and are waiting for client payment. The proposal is always the top page in the paperwork bundle. Each proposal has one item, but may have multiple components. For example, a chair may be the item that you are proposing, but you also need to include the fabric, the knitbacking, and the trim as components on the chair proposal. I always get 100% deposit on item proposals. Because of this, there is rarely a need for a final invoice to the client. If there is a final invoice it is usually because of a shipping cost.
Orders
Once a client pays for a proposal, it gets stamped "paid", the payment information is entered into Studio Designer, and I generate a Purchase Order (PO). I check that the PO is correct and print two copies. One copy gets mailed with the payment check to the vendor. The other copy is stapled to my check stub and then stapled again behind the Proposal (remember that the proposal is always the top page in the paperwork bundle). The paperwork is moved from the "Proposed" tab to the "Orders" tab.
Items in this section are in the expediting phase - whenever I flip through this section I can see what is on order. If I call to check the status I can write a note directly on the proposal page - estimated ship date or status for example. The more detailed and thorough your notes are the better organized you'll be.
Extra organization note: When items are done and have been delivered to a storage holding facility but have not been installed at the client's project I will move the paperwork to the back of the Order section. It's not quite ready for the Complete tab, but I don't want to see it everytime I open the Orders tab.
Complete
When the item is finally installed and delivered to the client, I move the item paperwork bundle (proposal, purchase order, quote) to the "Complete" tab. For very large projects the Complete section can be divided by room and may need additional 3-ring binders.
If a client rejects a proposal - they don't pay for an item because they don't want it - then I write VOID across the front of the paperwork and it moves into this section as well.
A note about items
Studio Designer allows you to create an item and that is what the rest of your design flow revolves around, there is no extra entry for invoices or purchase orders down the road. Below is an example from the Studio Designer website, you can see the first item is a red chair. You first enter information about the red chair and then can create proposals (to client), specifications (to contractors), purchase orders (to vendors), and invoices (to clients) from that initial item entry.
Really, all the client binder information above comes from Studio Designer and you don't necessarily need to print anything from the program. It can all stay as digital documents, but I find that having real paper helps keep me organized.

So that is how I keep all my projects organized.
Take Action:
- Take a few minutes and see if your organization system is working for you. Could it be improved? Do you need an entire revamp or just a few tweaks? What could make it smoother? What could you do to make your job easier, faster, simpler? Take little steps to achieve your goals.
Like this article? Share it with a fellow designer. #collaborationovercompetition